Wednesday, August 26, 2015

And We're Back


It's been a long while since I wrote a post. Life put a lot on my plate, and I needed a break from blogging to work through it all.

The good news is that homeschooling, at least, is still going strong.

We are "back to school" as of Monday and winding up slowly. First Sprout is in 2nd grade this year, and Second Sprout is a Kindergartner-- whoa! It's a little daunting to be teaching both of bigger sprouts this year, but I am excited to be getting more face-to-face time with my middle child.


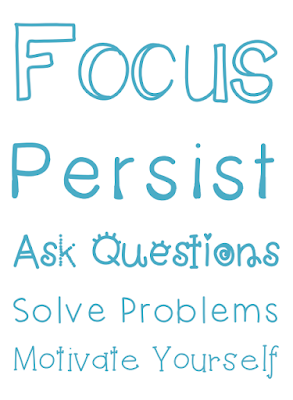
One thing I want to do differently this year is spend more time noticing and encouraging certain dispositions in my children. These are the qualities that I think will be helpful no matter where they are or what they are learning or who they are learning from. I spent a lot of time this summer mulling over what qualities I want to cultivate in my sprouts, and I came up with this list:

1) Focus: The ability to attend to a specific task without giving into distraction
2) Persistence: Trying a task repeatedly even when it is difficult or the outcome is unexpected
3) Asking Questions: Thinking critically about a situation, identifying gaps in your own knowledge or understanding, and then figuring out where to get that information
4) Self-Motivation: Learning because you want to and not because you have to
5) Problem Solving: Identifying problems and thinking about how to handle them in a productive way

Since I needed a nice way to post these characteristics for personal reference, I created a simple little poster to hang in our school area. I am hoping that this will help keep the qualities at the front of my mind so that I can reinforce them when I see them. The sprouts already think of themselves as problem solvers because of this strategy, so I know that pointing out the characteristics as they naturally occur will reinforce and strengthen these abilities.

If you'd like a copy of this PDF, I have made it available (for free) here.

Hopefully, things will be calming down for the foreseeable future as we get back into our school routine. I don't want to make any promises regarding a blogging schedule though, because, life. Until next time (whenever that may be),

Happy Learning!


Thursday, March 19, 2015

Doubles Addition Facts

It's been awhile since I posted, but we've still been super busy with school. We've been experimenting with some new ways of doing things and trying to find a new rhythm. Winter was hard for all of us, but the sun is shining again and we are (slowly) thawing.

The improvement in weather-- and attitudes-- means that we are turning corners. Math was hard for us last month because of a few factors:

1) Our text started moving FAST.

2) We were trying to memorize FACTS.

3) Math was suddenly NO FUN for First Sprout, unless it was also easy.

The major sticking point was when our text introduced doubles addition facts (2+2=4, 3+3+6, etc.) and then immediately tried to springboard into near doubles facts (2+3=5, or 2+3=2+2+1). We were still focused on learning the original facts and weren't ready to move on yet, so I stopped what we were doing to re-evaluate the situation. After a lovely chat with some of my teacher friends and family on Facebook, I had a few new ideas on how to proceed.

One thing I decided to do was to make some posters for the doubles addition facts to create a visual reference. I wanted something that would be interesting to First Sprout, and I settled on bugs. Using a combination of hand-drawing and digital-editing, I created this set of Bug Posters for us.

Three legs plus three legs equals six legs.

I printed out the uncolored posters, and let First Sprout customize the colors to make it hands on and personalized. Drawing and coloring the facts helped them to click into place, and we started using the pictures to help us remember. Now, whenever we see 4+4, we think about the number of legs on a spider while 7+7 is the number of legs on a roly poly. It ended up making a frustrating memorization exercise a lot of fun!

Perfect for spring!

Once we have our visual reference in place, we moved on to games and other visual ways to reinforce the concept, such as graphing. It's nice to know that we can improvise and slow down when needed to really get a handle on our content. We're moving on to other math topics now, confident in our ability to tackle tough challenges together.

Until next time,

Happy Learning!


Tuesday, January 27, 2015

Once Upon a Word Problem

I am going to keep my post short and sweet this week. I just wanted to let everyone know that I have a new product up in my Teachers Pay Teachers store; it's called Once Upon a Word Problem. This is a small packet (6 pages) of word problems for single-digit addition and subtraction that feature fairy tale and nursery rhyme characters.

I created this product to give First Sprout some additional practice in solving word problems. I also wanted the problems to be open ended so that I could see what strategies get used the most, since our textbook generally requires a specific strategy for each chapter. When I was teaching last year, I would use my students' names to create customized word problems, but I don't have many names to choose from this year. I thought the storybook characters would be a fun way to add familiarity and variety.

Also, since Microsoft has gutted clip art, this packet features my own graphics. It took some extra time, but I really enjoy how the product feels so much more like mine. I have a feeling that I will be using my own graphics a lot more in the future.

Until next time...

Happy Learning!

Wednesday, January 21, 2015

Making Old Crayons New Again

The sprouts and I needed to put a little color in our world to counteract the winter blahs today. Thankfully, I have been saving old bits of broken crayons and the random crayons kids get at restaurants that I can't stand to waste. I have also been hanging on to this nifty tutorial from Instructables that shows you how to melt old crayons down into a muffin pan to create funky, new-to-you crayon discs.

The things you will need


  • old, broken, and / or random crayons
  • a melting apparatus, such as a muffin pan or mini-muffin pan (NOTE: I chose to use a silicone pan that we keep only for crafting-- theoretically the crayons are non-toxic, but I personally wouldn't chance ruining a good baking pan)
  • a jelly roll pan  or other shallow, oven-safe dish to catch potential drips
  • your oven, pre-heated to 275 degrees Fahrenheit
  • oven mitts
  • wooden skewer (optional)
  • your freezer
  • little helpers (optional)

Step 1: Prep 

Gather your tired, your poor, your huddled crayons. Peel the papers off and break them up (if necessary) into chunks that are the right size for your chosen melting apparatus. Fill the cups well in a mini-muffin pan since the chunks will melt down into cups. A regular muffin pan provides some more leeway. Since we have been talking about states of matter, this was a great opportunity to discuss the properties of the solid versus liquid crayons!
Nearly three years worth of random crayons. I don't recommend saving crayons for this long because we ran out of steam long before they all got peeled.

Step 2: Melt

Pop your prepped muffin pan into the oven pan at 275 degrees Fahrenheit and let them melt for about 15-20 minutes. Watch them carefully, as different brands and types of crayons will melt at different rates. If there are some crayons popping up at odd angles or floating weirdly, you can use a bamboo skewer to poke them down again.
Little helpers can be involved with the prepping stage. Peeling paper off of crayons comes naturally to some kids (ahem... Second Sprout). In general, it's a good fine-motor activity for preschoolers and up.

Step 3: Cool

When all of the crayons look melted, use your oven mitts to carefully remove them and place them on a safe surface to cool (like a trivet or a wire rack). Allow them to cool at room temperature for 20-25 minutes, or until they look fairly solid throughout (no jiggling when you tap the pan). At that point, the pan can be put into the freezer to cool for an additional 5-10 minutes. When they are ready, pop them out of the pan and enjoy!
Our finished product! We easily had enough crayons for another batch, so we will probably be making more again soon.

 The sprouts are loving the bright colors, and the co-mingling of art and science is always a lot of fun. Since these are inexpensive to make and easy for the sprouts to help with, I am thinking that we'll be whipping another batch to share as Valentines for our home school group.

Happy Learning!


Wednesday, January 7, 2015

Planning Some Winter Fun

We are back into the swing of school after a wonderful holiday break. We are in process of wrapping up old business, assessing progress and planning for the second half of our school year.

With the frigid weather, First Sprout has been showing a lot of interest in the science of snow. I sat down with some resource books and the internet to plan out a few ideas for a cross-curricular unit. I tried to fancy up my notes a little bit so that I could share them here in a friendly, printable format.

This photograph does not adequately convey the snow or the cold that is happening right now.

I didn't go into a lot of detail on materials or procedures on the print out, but here's a more detailed description of what we're planning:

*solid, liquid and gas balloons*

I found a really neat blog post from A Day in First Grade that helps children to identify the states of matter and distinguish the characteristics of solids, liquids and gasses using balloons. The idea is to fill two balloons with water and freeze one. Then, fill up a third balloon with air. Children can then observe and compare the three balloons to introduce and reinforce science vocabulary.

*ice melt observations*

This activity will help children explore the question; "What happens when frozen water is warmed slowly?" Since many children have seen ice melt before, this activity provides and opportunity to slow down and use science processes such as prediction, data collection (measurement), recording observations with pictures, and drawing conclusions. Children can also compare how ice melts in air versus water, if you are so inclined. 

*boiling ice*

I found this idea in Dad's Awesome Book of Science Experiments by Mike Adamick, which was one of my husband's Christmas presents. It's a great book, and I plan to use it as a school resource since dads shouldn't get to have all the science fun. This activity helps children explore; "What happens when frozen water is warmed rapidly?" The basic idea is to freeze water dyed with food coloring in an ice cube tray. When you ice cubes are ready, boil a pot of water, add the ice, and watch what happens. This would be a natural progression from watching ice melt because you can compare and contrast what happens when the ice is warmed up rapidly rather than gradually. (Obviously requires constant adult supervision.)

*make it snow*

So, there were quite a few videos circulating last year of people throwing boiling water into very cold air to make instant snow. It seems cool, BUT I plan to be very very careful when trying this because a lot of people also got burned trying it out. If you have a safe place to try it, protected from the wind, that won't potentially harm any passersby, then it would be a really neat experiment to try. Otherwise, this one might just be better to check out on video. This activity helps to explore: "What happens when boiling water is cooled rapidly?" It can also be useful for addressing science process skills such as making predictions, observing reactions, and recording results. (Again, this one requires constant adult supervision. Please be careful!)

*Read aloud: Snowflake Bentley by Jacqueline Briggs-Martin*

Snowflake Bentley is the kid-friendly biography of Wilson A. Bentley, a photographer and scientist who devoted his life to studying the structure of snowflakes. It's a great book for tying mathematics, art, and history into a winter unit.

*snowflake observations*

I pulled this activity from The Kids' Science Book by Robert Hirschfeld and Nancy White, and it is pretty simple. The idea is to take a piece of black paper and a magnifying glass outside on a snowy day. As snowflakes, land on the paper, children can use a magnifying glass to get a closer look. It's a great opportunity to practice observation and it ties in beautifully with Snowflake Bentley!

*paper snowflakes*

Explore symmetry and geometry with this classic winter art project. There are tons of tutorials and guides available on how to make snowflakes with paper. The two most helpful tricks I've discovered are starting with square (or circular paper) and folding it into sixths (fold it in half first, then into thirds). This results in a more realistic hexagonal structure that can be tied into your observations and reading.

*snow painting*

Make the snow your canvas by putting dyed water into squeeze (or spray) bottles and painting the snow. I haven't personally tried this one out yet, but I am hoping to review color mixing by starting with the primary colors (red, yellow, blue) and seeing what we can create from there.

*Read aloud: 100 Snowmen by Jennifer Arena*

This book is super cute and chock-full of math. The snowmen are outside playing, and the book playfully leads you through a series of math sentences building to a grand total of 100. It's a great way to play with math, and you can challenge your children to see if they can create a different way of proving the math correct.

*How to build a snowman*

I wanted to include a writing project with our winter unit, and it seems like a good opportunity to practice informational writing. Children can create a list of needed materials (independently or with help via shared writing) and then plan out the steps for building a snowman. Of course, this is a good excuse to get out and build some snowmen for... umm... educational purposes. Kids need background knowledge, after all. I am planning on creating templates for this project and more "how to" writing projects since I think they are a fun take on informational writing-- please stay tuned for more!


Until next time, I hope you all are staying warm!

Happy Learning!
Wednesday, December 10, 2014

Colorful Shape Mobile

So we are taking a break from number sense in math and working on geometry for a little. First Sprout is a very visual learner, so geometry comes naturally in a way that numbers do not. The break has two purposes. First, it allows First Sprout to feel more confident and competent in math. For the first time since school started, math is exciting and fun. Second, it gives me the opportunity to step back and figure out some new strategies for helping her to feel that same sense of confidence and competence in other areas of math as well. I think that part of the challenge is developmental-- conservation still hasn't clicked. So while First Sprout can perform most grade-level math operations, it still requires lots of concrete objects and manipulatives. She still needs proof that 3 + 4 and 4+3 equal the same amount. She still needs reminders on one-to-one correspondence. As a result, organization and carefulness are a huge challenge for us with math.

Thankfully, I have time and flexibility at my disposal. I have the luxury of giving her individual attention and gentle reminders. First Sprout has been working really hard at math, but switching to geometry gives her a break from all of that hard work. It just comes more naturally!

So we have been busy playing with tangrams and pattern blocks, counting sides and angles. Today, we read the perennial teacher favorite, The Greedy Triangle by Marilyn Burns and did a really fun art project. We made a colorful shape mobile.

Here's how the mobile looks hanging from the light over our dining room table.

Materials

- 1 or 2 clean, clear milk jugs
- scissors
- permanent markers
- work mat, table cloth, or cookie sheet (to protect your table from the markers... use something that's dedicated or will be dedicated to crafting!)
- single hole punch
- twine, yarn, or string for hanging

Fun for the whole family; however, I highly recommend protecting your work surface!

Steps

1. Once your milk jug is clean, use scissors to cut shapes. I cut a variety of circles, triangles, and quadrilaterals (even an octagon or two), but you could cut out whatever shapes suit you. I made a variety of sizes ranging from 1-4" so that we could compare the essential attributes of each shapes.

2. This step is optional, but I had First Sprout sort the shapes before we started. She chose to begin by separating the round shapes from the polygons. Then she sorted the polygons into triangles, quadrilaterals, and octagons. Then she sorted the quadrilaterals even further into trapezoids, parallelograms, rectangles, and squares. It was a math vocabulary workout for both of us!

3. Use an old cookie sheet or table cloth to protect your work surface. Color the shapes using permanent markers. All three sprouts and I got involved in this step. It's a great opportunity to reinforce color and patterns with littler ones.

4. Punch a hole into the colorful shapes, string with yarn or twine, and display any way you choose. We made a mobile, but it could easily be a garland as well. Enjoy your math-tastic work of art!

So pretty with the light shining through. I think we'll enjoy looking at this for a long time.

We are all really happy with the results, and it is adding to the string of successes (seewhatIdidthere) we've had with geometry. I am looking forward to posting more ideas pairing books and activities for learning about shapes. If you have any requests, let me know in the comments!

Happy Learning!

Thursday, December 4, 2014

My Holiday Wish List For Us All

Body Love

May we stop criticizing how we look (especially in front of children). There are so many ways to be beautiful and so many ways to be healthy. Let's quit the body shaming and show love for all levels of ability and sizes and types of bodies.

Hard Emotions 

May we all have a friendly ear and a shoulder to cry on for those hard days, so that we can in turn be that friendly ear or that warm shoulder. Feeling anger, sadness, and frustration do not make you a bad person. Let's all be a little more gentle with ourselves and each other.

Respect 

May we all give and receive respect. Sometimes it's hard to respect someone when we may not agree with or understand their choices. We all make mistakes. But we are all human, and we all deserve basic human dignity and access to safe, clean, loving spaces to exist.

Courage 

May we all have the courage to ask hard questions and stand up to defend others. Maybe you choose to share links on social media or maybe you join in with a protest or maybe you write to your local congress person. Maybe you just do the best you can to make it through each day with the challenges you face. Courage has many forms.

Empathy 

May we all have the opportunity to exercise empathy every day. Take a few moments and put yourself in someone else's position-- with compassion rather than judgement. Read stories from the first person point of view, seeking authors who have different lives and perspectives than yours. It's hard to find narratives from people of color or people who practice non- Judeo Christian religions or people of different body sizes or ability levels, but it's worth it.

Happy Holidays (whatever you may choose to celebrate) from our family to yours!